![<?echo $_SERVER['SERVER_NAME'];?>](/template/twentyseventeen/skin/images/header.jpg)
As we all know, 3D printers tend to be more expensive, even the most inexpensive desktop 3D printers have several thousand yuan, for many people, not to say only buy. But in our daily lives, there is a time when there is a need for a 3D model of something. So what if you don't have a 3D printer yourself and can't find a place to offer 3D printing services nearby? Don't worry, an artist and engineer named Michael Koehleart has found a very clever way to get a “pseudo†color 3D print using paper, printer and laser cutters.
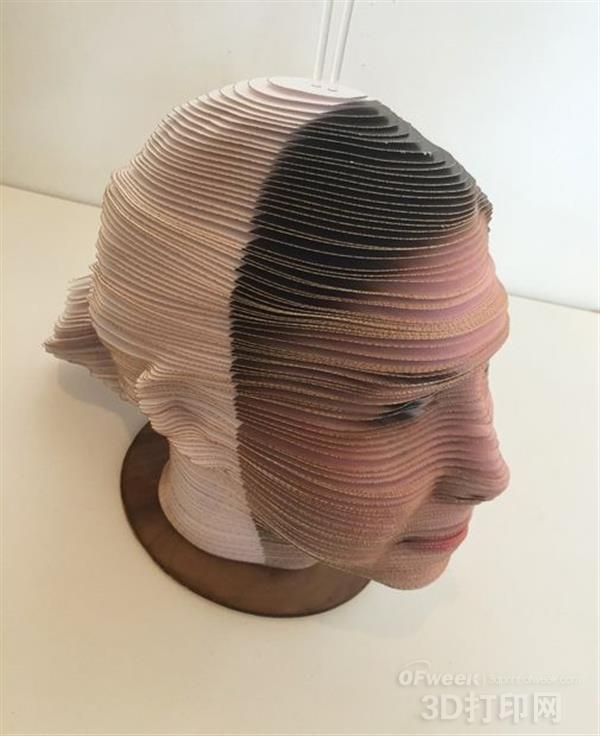
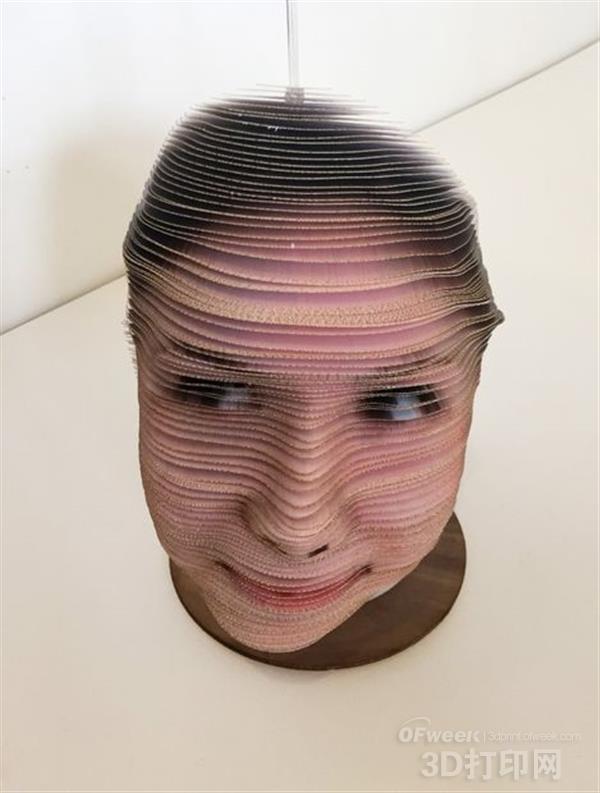
It is reported that Koehleart's cool technology mainly includes four steps: creating a projected image, slicing the model, slicing the image, and printing/assembling. He shared his skills on the Instructables of the DIY hot station and posted a few photos of some of his 3D avatars made with this technology, which is very impressive (see below).
According to Koehleart's detailed tutorial, to make these "pseudo" color 3D printed statues you need to prepare:
Model file in STL format
Projected image, which can be a screenshot of a texture model or a separate image
printer
Sturdy cardboard/card or something else
Laser cutting machine, scissors or equipment for cutting paper
Other auxiliary materials for assembly, such as acrylic or wood pins and gaskets with a certain thickness
Some programming skills
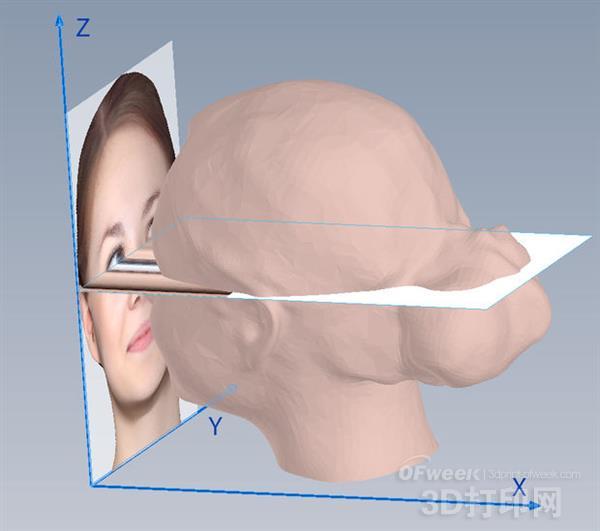
To start the pseudo 3D printing process, you first need to create a projected image. You can use any 3D modeling software by simply taking a screenshot from the front of the 3D model. Then load a full-color image, crop it, and align it exactly with the screenshot of the 3D model itself. This is mainly to ensure that the color image is accurately synchronized with the colorless 3D model.
Then, in order to carry out the following steps, Koehleart specially wrote a program. Both the 3D model and the full-color projection image above require layer-by-layer slicing, each layer being a piece of cardboard. Then, according to some technical tips, the surface of each cardboard is printed to form a layer of the color 3D model. Each piece of cardboard is then cut out using a laser cutter or scissors. The final step is to assemble, the "slices" made of these cardboards are placed on a shaft by thickness, and some washers are added between them. So a style-specific "pseudo" color 3D printing model is done! For more detailed instructions, please click here to view the tutorial shared by Koehleart.
Black Tempered Glass ,Heat Strengthened Glass ,Premium Tempered Glass ,Cover Glass For Oven
WCH Temper Glass Co., Ltd , https://www.temperglasswch.com